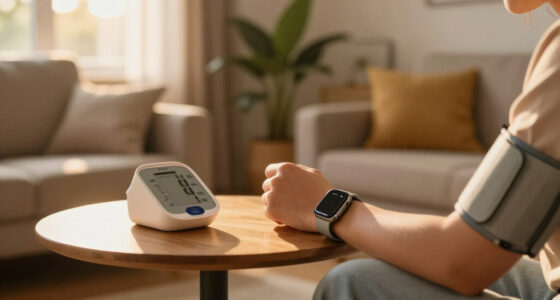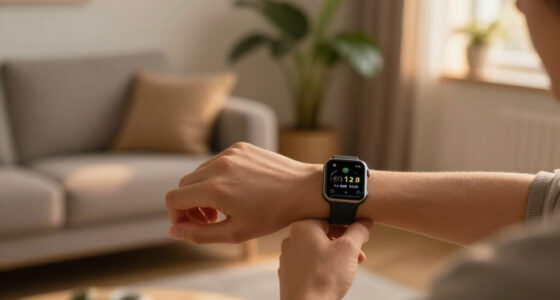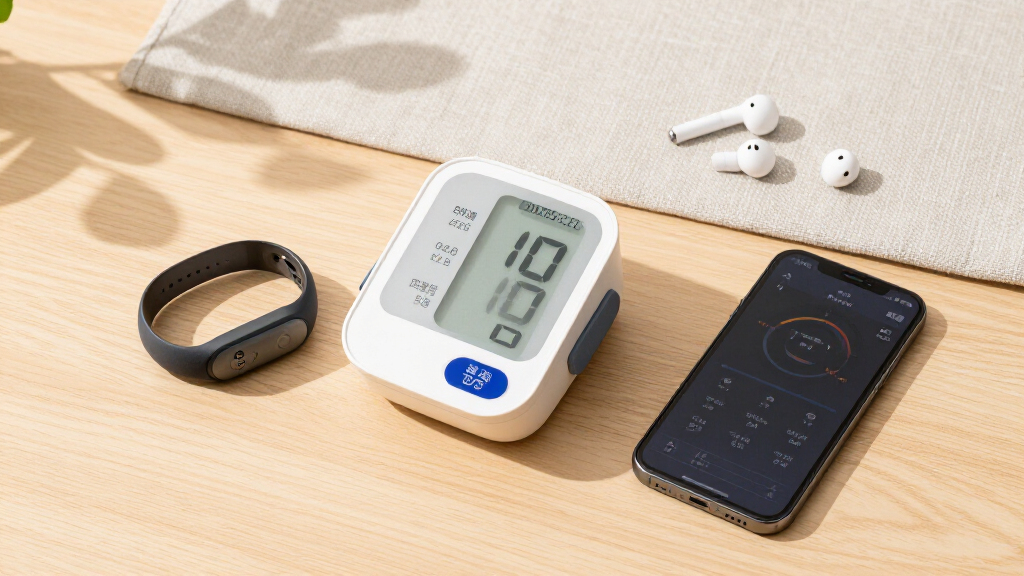
Home health monitoring devices allow individuals to track vital health metrics such as blood pressure, blood glucose, heart rate, and oxygen levels from home. This guide provides step-by-step instructions for setting up and using these devices accurately, ensuring reliable data collection for personal health management. Suitable for adults responsible for their own health or caregivers assisting others, this process requires basic familiarity with device operation and some technical comfort. Completing this guide will enable you to confidently monitor key health indicators and interpret the results correctly.

Get health and wellness essentials delivered free — and shop member deals
- Fast, free delivery on millions of items
- Access to Prime Big Deal Days deals on October 6–7
- Prime Video, Amazon Music and more included
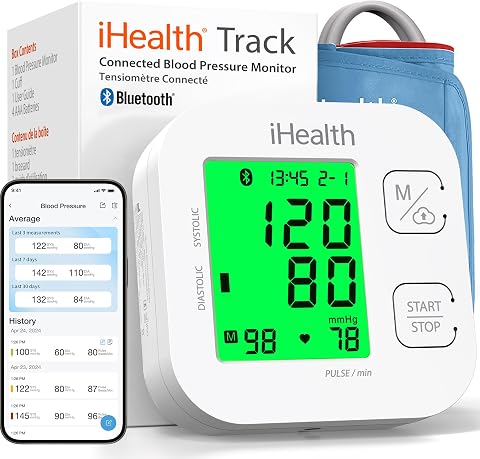
iHealth Track Smart Upper Arm Blood Pressure Monitor with Wide-Range Cuff
- ✔ Cuff Size: 8.7" – 16.5" (22-42cm)
- ✔ Batteries: 4 AAA
- ✔ Connectivity: Bluetooth 4.0+
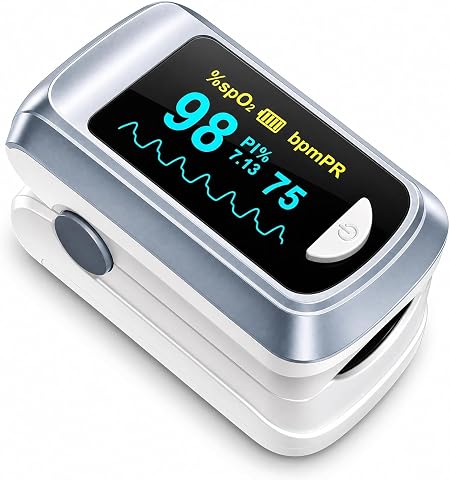
Fingertip Pulse Oximeter Blood Oxygen Saturation Monitor with OLED Screen, Lanyard, and Batteries
- ✔ Display: OLED
- ✔ Power: 2 x AAA Batteries
- ✔ Auto Power-Off: Yes

KardiaMobile 1-Lead EKG Monitor, FDA-Cleared Personal Heart Monitor for Detecting AFib and Arrhythmias
- ✔ Model Number: AC-009
- ✔ Unit Count: 1
- ✔ Batteries: Replaceable CR2016, lasts up to 2 years with 2-3 EKGs/day
Difficulty: Intermediate | Time: 30-45 minutes
What You’ll Need
Tools & Materials:
- home health monitoring device (e.g., blood pressure monitor, glucometer, pulse oximeter)
- batteries or power supply for devices
- smartphone or computer (if device requires app)
- pen and notebook or digital log for recording data
Knowledge:
- basic understanding of health metrics (e.g., blood pressure, blood glucose)
- ability to follow device-specific instructions
- familiarity with smartphone or device app (if applicable)
Verify that the devices are compatible with your smartphone or computer if app integration is needed. Ensure batteries are fresh or the device is charged before starting. Allow extra time for initial setup if installing apps or creating accounts.
iHealth Track Smart Upper Arm Blood Pressure Monitor with Wide-Range Cuff
The iHealth Track stands out primarily for its clinically accurate readings and user-friendly design. Its large multi-color backlit display makes reading easy, especially for users with visual impairments. The device’s ability to store up to 99 readings and sync via Bluetooth allows for comprehensive tracking and sharing with healthcare providers. Compared with the basic fingertip pulse oximeters, it offers more detailed health insights with heart rhythm disturbance detection, making it ideal for those managing hypertension or requiring regular blood pressure checks. However, it requires Bluetooth 4.0+ and may not fit all arm sizes comfortably, especially for very small or large arms.
Pros:
- Clinically accurate and meets ESH 2010 standards
- Large, easy-to-read multi-color display
- Stores up to 99 readings for trend tracking
- Detects heart rhythm disturbances
Cons:
- Requires Bluetooth 4.0+ for syncing
- Battery replacement needed after extensive use
- Cuff size may not fit all upper arms
Best for: Individuals needing consistent, accurate blood pressure management with smartphone integration.
Not ideal for: Users who want a simple, non-connected device or have very small or large arms outside the cuff size range.
Bottom line: A top choice for regular blood pressure monitoring with reliable data and smartphone connectivity, though cuff fit and Bluetooth requirements may limit some users.
“A top choice for regular blood pressure monitoring with reliable data and smartphone connectivity, though cuff fit and Bluetooth requirements may limit some users.”
Fingertip Pulse Oximeter Blood Oxygen Saturation Monitor with OLED Screen, Lanyard, and Batteries
The Fingertip Pulse Oximeter is perfect for on-the-go health checks, offering instant blood oxygen (SpO2) and pulse rate readings via an OLED screen with waveform graphics. Its compact and lightweight design makes it highly portable, ideal for outdoor activities, travel, or fitness monitoring. The device is straightforward: just press a button for quick results, and it comes with batteries and a lanyard for convenience. Compared with more advanced devices, it lacks features like Bluetooth or data storage, making it less suitable for users needing detailed history or integration. Its limited measurement scope and battery dependency are tradeoffs for simplicity and portability.
Pros:
- Bright OLED display with waveform graph
- Lightweight and portable for travel
- Simple one-button operation
- Includes batteries and lanyard
Cons:
- Requires 2 AAA batteries (not rechargeable)
- Limited to fingertip measurements
- No Bluetooth or data storage capabilities
Best for: Active individuals and travelers seeking immediate, easy-to-read oxygen and pulse measurements.
Not ideal for: People requiring detailed health tracking or those with medical devices like pacemakers, due to limited data features.
Bottom line: A handy, portable device for quick oxygen and pulse checks, perfect for outdoor use, but lacking advanced features for comprehensive health monitoring.
“A handy, portable device for quick oxygen and pulse checks, perfect for outdoor use, but lacking advanced features for comprehensive health monitoring.”
KardiaMobile 1-Lead EKG Monitor, FDA-Cleared Personal Heart Monitor for Detecting AFib and Arrhythmias
The KardiaMobile 1-Lead EKG is a compact, FDA-cleared device that captures a medical-grade ECG in just 30 seconds. Its pocket-sized design makes it extremely portable, and its compatibility with most smartphones allows for quick analysis of heart rhythm issues like AFib and arrhythmias. Unlike the blood pressure monitor or pulse oximeter, this device provides a detailed cardiac assessment, making it invaluable for users with known arrhythmias or those wanting to supplement regular checkups. However, it doesn’t check for heart attacks and isn’t suitable for pacemaker users. It requires a smartphone and app to operate, which might be a barrier for some users preferring standalone devices.
Pros:
- Portable and pocket-sized
- Provides medical-grade ECG in 30 seconds
- Detects AFib and arrhythmias accurately
- No cords or Bluetooth needed
Cons:
- Requires a compatible smartphone and app
- Not designed for pacemaker users
- Does not detect heart attacks or provide continuous monitoring
Best for: Individuals needing quick, reliable ECGs for arrhythmia detection, especially those with a history or risk of cardiac issues.
Not ideal for: Users with pacemakers or those seeking a comprehensive heart health device that doesn’t rely on a smartphone.
Bottom line: An excellent choice for on-the-go cardiac screening, especially for those with arrhythmia concerns, though it depends on smartphone compatibility.
“An excellent choice for on-the-go cardiac screening, especially for those with arrhythmia concerns, though it depends on smartphone compatibility.”
As an Amazon Associate we earn from qualifying purchases.
Before You Start
Read the device manuals thoroughly to understand specific features and safety warnings. Confirm that your environment is suitable for measurement—quiet, stable, and at a comfortable temperature. If monitoring your own health, consult with a healthcare professional about target ranges and proper technique. Avoid measuring immediately after exercise or eating unless instructed, as this can affect accuracy.
Step-by-Step Instructions
Step 1: Select the appropriate device
Identify which health metric you need to monitor and choose the corresponding device, such as a blood pressure cuff, glucometer, or pulse oximeter. Check that the device is brand-new or has been properly sanitized if previously used. Ensure the device is compatible with your data logging method (manual or app-based).
Tip: Use devices with clear displays and simple interfaces for ease of use. Confirm that the device has recent calibration or validation for accurate readings.
Check: The selected device is appropriate for the metric, powered on, and ready for use, with all components in good condition.
Step 2: Prepare the device for measurement
Follow the manufacturer’s instructions to assemble or prepare the device. Insert batteries or connect the power supply if needed. Calibrate or zero the device if required by the manufacturer’s guidelines. Have your recording method ready, whether a paper log or digital app.
Tip: Double-check that all connections are secure and that the device is clean. Read any calibration instructions carefully to ensure accuracy.
Check: Device is powered on, calibrated if necessary, and ready to take measurements without errors or warnings.
Step 3: Position yourself correctly
Assume the proper position for measurement as specified by the device instructions. For blood pressure, sit upright with feet flat on the floor, arm supported at heart level. For blood glucose, wash hands thoroughly and dry completely. For pulse oximetry, sit still and keep the device on your fingertip or earlobe as instructed.
Tip: Avoid talking, moving, or having a restless posture during measurement to prevent inaccurate readings.
Check: Your position aligns with device instructions, and you are calm and still, ready for a measurement.
Step 4: Take the measurement
Activate the device as instructed—press the start button or connect via app. Remain still and relaxed during the process. For blood pressure monitors, ensure the cuff is snug but not too tight. For glucose meters, insert a test strip and prick your finger if required. For pulse oximeters, leave the device in place until it displays a reading.
Tip: Do not talk or move during measurement. If the reading seems abnormal, repeat after resting for five minutes.
Check: Device displays a stable, complete reading without errors or warnings, and the value is visible for recording.
Step 5: Record the results
Write down the measurement immediately, noting the date, time, and any relevant conditions (e.g., before meals, after medication). If using an app, save or sync the data according to instructions. Keep a consistent log to track trends over time.
Tip: Use a dedicated health journal or digital app with automatic timestamping for accuracy. Review the logs regularly for patterns or irregularities.
Check: Measurement data is accurately recorded with appropriate context, ready for review or sharing with healthcare providers.
Step 6: Repeat measurements as recommended
Follow your healthcare provider’s guidance to perform additional measurements at specified intervals or times of day. Reset or recalibrate the device if necessary between readings.
Tip: Adhere to your provider’s recommended frequency, and allow adequate rest between measurements to prevent skewed results.
Check: Consistent, correctly performed measurements are recorded over multiple sessions, providing reliable data.
Common Mistakes to Avoid
- Measuring immediately after exercise or eating — Wait at least 15-30 minutes after physical activity or meals before taking readings to ensure accuracy.
- Using a device that is not calibrated — Verify calibration status regularly and follow calibration instructions detailed in the manual.
- Poor positioning or movement during measurement — Sit still, maintain proper posture, and follow device-specific positioning guidelines for each reading.
- Recording or interpreting data incorrectly — Double-check entries and understand normal ranges. Use the same conditions each time for consistency.
Troubleshooting
Problem: Device displays error message or does not turn on
Solution: Check batteries or power connection, replace or recharge if needed, and follow device-specific troubleshooting steps.
Problem: Inconsistent or unusually high/low readings
Solution: Ensure correct positioning, wait before measuring if recent activity, and verify device calibration.
Problem: Device fails to record data or sync with app
Solution: Restart the device or app, check Bluetooth or Wi-Fi connections, and ensure software is up to date.
What Success Looks Like
Successful completion results in accurate, consistent readings that are correctly recorded in your log, with no error messages or malfunctions. Data should reflect your current health status and align with expected ranges when following proper measurement protocols.
Next Steps
Review your recorded data regularly to monitor trends. Share results with your healthcare provider during appointments. Replace or recalibrate devices as needed. Continue practicing proper measurement techniques for ongoing health management.
Frequently Asked Questions
How often should I measure my health metrics?
Follow your healthcare provider’s instructions. Common frequencies include once daily for blood pressure, several times a day for blood glucose, or as advised for other metrics.
Can I use multiple devices at the same time?
Yes, but ensure each device is correctly calibrated and used according to instructions. Avoid overlapping measurements that could cause confusion or stress.
What should I do if my readings are consistently high or low?
Record the readings and consult your healthcare provider promptly. Do not adjust medications or treatments without professional guidance.
Are digital logs or apps necessary?
They are helpful for tracking trends and sharing data with your healthcare provider, but manual logs are acceptable if kept accurate and up-to-date.
Fall Picks
fall essentials
As an affiliate, we earn on qualifying purchases.