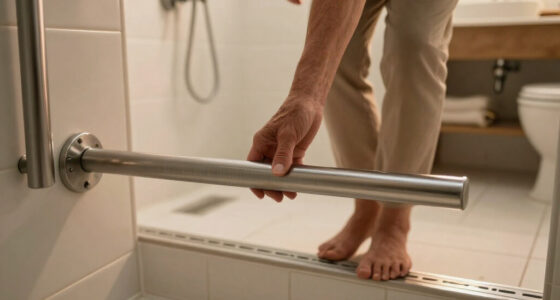
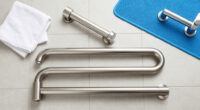
This guide helps homeowners and caregivers choose locations, select suitable grab bars, and install them securely to support safer movement in bathrooms and other fall-risk areas. It is intended for readers who can use basic hand tools; drilling into tile, masonry, or an unfamiliar wall may require a qualified installer. Allow about 1-3 hours per bar, including layout and checks. A grab bar is a support, not a substitute for a comprehensive fall-prevention plan or a properly assessed mobility aid.

Get health and wellness essentials delivered free with Prime
- Fast, free delivery on millions of items
- Prime Video, Amazon Music and more included
- Member-only deals all year

Grab Bars for Shower, 16 Inch Shower Handle, 2 Pack, Polished Nickel
- ✔ Brand: Ravinte Hardware
- ✔ Pack quantity: 2 bars
- ✔ Length: 15.75 inches (listed as 16 inches)

Bed Rails for Elderly Adults with Bedside Support Legs
- ✔ Brand: YrHeiper
- ✔ Model: XCL-6603
- ✔ Frame material: Metal

TAILI Grab Bars for Shower – Suction Handles, 2-Pack, 16.8-Inch Grey
- ✔ Brand: TAILI
- ✔ Model: AW678
- ✔ Pack quantity: 2 handles
Difficulty: Intermediate | Time: 1-3 hours per bar, depending on wall construction and installation method
What You’ll Need
Tools & Materials:
- Grab bar rated for its intended support use, with manufacturer-supplied mounting hardware
- Stud finder suitable for the wall surface, plus a small magnet if useful for locating screws
- Tape measure, pencil, level, and masking tape
- Drill and bits suited to the wall material and supplied fasteners
- Screwdriver or driver bit that matches the fasteners
- Eye protection and, for drilling tile or masonry, the specified bit and any recommended protective equipment
Knowledge:
- Basic measuring, drilling, and fastening skills
- Ability to identify the wall type and follow the grab bar manufacturer’s installation instructions
- Understanding that a grab bar must attach to structural framing or a tested, rated anchor system, not just wall covering
Check the bar’s label and instructions for its permitted use, load rating, fasteners, and mounting requirements. Do not assume a towel bar, suction-cup bar, or ordinary wall anchor can support body weight. If the user has limited balance, strength, or mobility, ask an occupational therapist or other qualified professional to recommend bar locations and orientation. Check for plumbing and electrical wiring before drilling.
Grab Bars for Shower, 16 Inch Shower Handle, 2 Pack, Polished Nickel
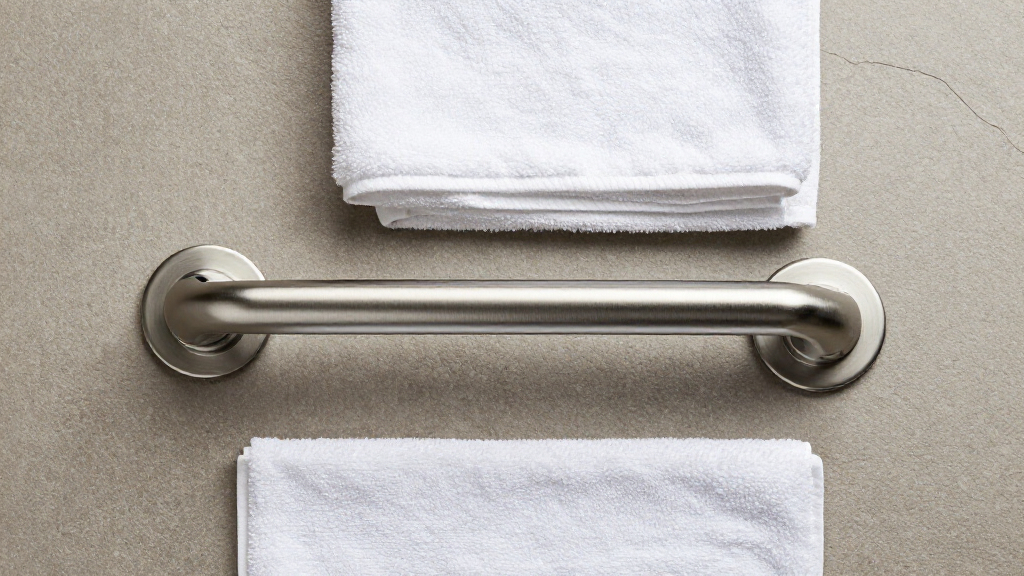
For a bathroom where the goal is a dependable handhold in a fixed location, the Ravinte Hardware pair is our Best Overall. Each bar is stainless steel, has a 1-inch diameter and a knurled, non-slip surface, and is designed to be screwed into the wall. That combination makes it a stronger fit for a planned shower installation than TAILI’s removable suction handles, whose usefulness depends on having a suitable smooth surface. The polished nickel finish also suits buyers who want safety hardware to blend with other bathroom fixtures.The main compromise is that the more permanent installation takes more planning. These bars require drilling and secure wall mounting; buyers need to confirm that the mounting method is appropriate for the wall and installation location rather than assuming the bar can be fixed safely anywhere. The listed 500-pound capacity is a product specification, not a reason to skip proper anchoring or installation guidance. Compared with the TAILI pair, Ravinte is less convenient to reposition, but it avoids relying on suction as the attachment method. The two-bar pack can also be limiting if a larger bathroom needs several support points.This is the most sensible choice for someone setting up a lasting shower support point and willing to handle installation correctly. It is not the quick, damage-free option, and it does not cover a fall risk at the bedside like the YrHeiper rail. Treat it as fixed bathroom hardware, not a portable handle.
Pros:
- Knurled grip is intended to help maintain contact with wet hands.
- Stainless-steel construction and polished nickel finish suit a fixed bathroom installation.
- Stated capacity is 500 pounds, subject to correct mounting and use.
- Two bars provide more placement flexibility than a single fixed handle.
Cons:
- Requires drilling and secure wall installation.
- Two bars may not cover all support locations in a larger bathroom.
- Not repositionable like a suction-mounted handle.
Best for: People planning a permanent shower or bathroom installation who can confirm suitable wall mounting and want a textured stainless-steel grip.
Not ideal for: Renters who cannot drill, buyers who need to move the support between locations, or anyone whose wall cannot be safely prepared for mounting.
Bottom line: We recommend Ravinte for a planned, permanently mounted shower handhold, provided the wall and installation method are appropriate.
“We recommend Ravinte for a planned, permanently mounted shower handhold, provided the wall and installation method are appropriate.”
Bed Rails for Elderly Adults with Bedside Support Legs
Not every fall-prevention need happens in the bathroom. The YrHeiper rail earns Best for Bedside Transfers because its steel frame is designed to provide a handhold alongside a bed, with support legs and tie-down straps rather than wall mounting. It is the only product in this lineup aimed at helping with movement around a mattress, so it fills a gap that neither shower bar can address. Its ASTM F3186-17 safety certification and stated 350-pound capacity give buyers relevant product information to consider, while the foam grip and mesh pocket add convenience at the bedside.Installation is tool-free, but fit is not universal in practice: the listing specifies King, Queen, Full, and Twin beds with mattresses from 7.9 to 13 inches thick. It is not compatible with recessed or adjustable frames, and the rail has no height adjustment. That makes it less adaptable than the wall bars for choosing an exact handhold position. Unlike Ravinte or TAILI, it also offers no support in a shower or at a toilet. Buyers should check that the frame, mattress, and strap arrangement are compatible before relying on it, and follow the manufacturer’s setup instructions.This option makes sense when the challenge is getting into or out of bed, or steadying oneself beside the mattress. It is not a substitute for a professionally appropriate transfer aid in every care situation, and it should be skipped if the bed design falls outside its stated compatibility. Its role is specific bedside support, not all-room fall prevention.
Pros:
- Designed specifically for support beside a bed rather than in a wet area.
- Tool-free strap installation avoids drilling into walls.
- Fits listed Twin, Full, Queen, and King beds with compatible mattress thickness.
- Includes a non-slip foam grip and mesh pocket for small personal items.
Cons:
- Not compatible with recessed or adjustable bed frames.
- No height adjustment is listed.
- Does not provide support in bathrooms or other rooms.
Best for: Adults who need a bedside handhold and have a compatible bed and mattress within the listed dimensions.
Not ideal for: People seeking shower or toilet support, users with recessed or adjustable bed frames, or buyers who need an adjustable-height rail.
Bottom line: We choose YrHeiper for compatible beds where bedside transfers are the priority, not as a replacement for bathroom grab bars.
“We choose YrHeiper for compatible beds where bedside transfers are the priority, not as a replacement for bathroom grab bars.”
TAILI Grab Bars for Shower – Suction Handles, 2-Pack, 16.8-Inch Grey
When drilling is off the table, the TAILI suction handles are the most convenient bathroom option in this comparison. The two 16.8-inch bars attach with dual suction cups and locking latches, and the anti-slip strip adds texture where the hand contacts the bar. They can be removed and repositioned without drilling, a practical contrast with Ravinte’s permanent wall-mounted design. That convenience can suit renters or households that want a removable handle, but only when the installation surface meets the product’s requirements.The limitation is central to the buying decision: TAILI works only on smooth, nonporous surfaces. Uneven, porous, or otherwise unsuitable walls rule it out, so buyers should not assume it will attach to every shower wall or tile. The stated maximum load is 240 pounds per bar, lower than Ravinte’s listed capacity, and the suction attachment method makes correct application and regular checks especially important. These handles should not be treated as a substitute for a fixed, properly installed grab bar when a person needs dependable weight-bearing support.Compared with Ravinte, TAILI is easier to install and remove but less universal in where it can be used. Compared with the YrHeiper bedside rail, it addresses a completely different movement: bathroom balance rather than bed transfers. We see it as a surface-dependent, removable aid for appropriate settings, not the default choice for every shower. Follow the instructions for attachment and use, and confirm that the user’s support needs are within the product’s intended role.
Pros:
- No drilling is required, so the handles can be removed without wall holes.
- Dual suction cups use locking latches for attachment.
- Anti-slip strip adds grip texture along the handle.
- Two bars provide options for more than one suitable location.
Cons:
- Only intended for smooth, nonporous surfaces.
- Stated maximum load is 240 pounds per bar, below Ravinte’s listed figure.
- Attachment depends on correct placement and ongoing checks.
Best for: Renters or households seeking a removable bathroom handle who have a verified smooth, nonporous mounting surface.
Not ideal for: Anyone with uneven or porous shower walls, or a user who needs a permanent, substantial weight-bearing support point.
Bottom line: We recommend TAILI when a no-drill handle is needed and the surface is compatible, while emphasizing that suction mounting has narrower limits than fixed installation.
“We recommend TAILI when a no-drill handle is needed and the surface is compatible, while emphasizing that suction mounting has narrower limits than fixed installation.”
As an Amazon Associate we earn from qualifying purchases.
Before You Start
Walk through the movements the person needs support with: entering and leaving a shower or tub, standing from a toilet, or moving along a hallway. Choose a location the person can reach before balance becomes uncertain. Bar placement depends on the user’s height, reach, dominant side, transfer method, and mobility aid; a universal height may not fit everyone.
Inspect both sides of the proposed wall when possible. Avoid drilling near plumbing fixtures, outlets, switches, and likely pipe or cable routes. If you cannot confirm what is behind the wall, stop and ask a qualified installer. For a rental, get the owner’s written approval before making holes. Never use a grab bar as a substitute for a handrail on stairs unless it is specifically designed and installed for that purpose.
Step-by-Step Instructions
Step 1: Choose the support points
Identify the exact movement that needs support and mark where the user naturally reaches while performing it. In a shower, consider a vertical bar near the entry for stepping in or out and a horizontal or angled bar where the user can reach while standing. Beside a toilet, position support where the user can grasp it during sitting and rising. Keep the bar clear of doors, controls, and other fittings.
Ask the intended user to test the reach without relying on an unstable surface. If a therapist has recommended a placement, use that plan. Do not select a location solely because a stud is convenient; the final position must be both structurally sound and usable.
Tip: A bar that is secure but out of reach will not provide useful support. Check access from the user’s usual approach and transfer position.
Check: The intended user can reach the proposed bar position comfortably during the relevant movement, without twisting or stretching dangerously.
Step 2: Confirm the wall and mounting method
Determine whether the bar will attach to wood studs, masonry, or another approved structural substrate. Read the bar instructions and confirm that the supplied fasteners match the wall construction. For a typical framed wall, fasteners must penetrate the specified depth into a stud or approved blocking. If the planned position falls between studs, use a mounting system specifically rated for grab-bar loads and compatible with that wall; do not rely on generic plastic drywall anchors.
Check the wall for pipes and wiring using an appropriate detector and visual clues such as nearby taps, drains, outlets, and switches. If the wall construction or hidden services are uncertain, have a qualified installer inspect it before drilling.
Tip: Tile is a finish, not structural support. The bar must be secured through the tile into framing or a suitable rated substrate, using the installation method specified for that surface.
Check: You can identify the structural attachment points and have the correct bar, fasteners, and drill bits for the wall.
Step 3: Mark and check the layout
Hold the bar at the selected location and mark its mounting-hole positions with a pencil or masking tape. Use a level to check the orientation, then measure the distance between mounting points and compare it with the bar’s plate or flange. Confirm that every required hole will land on the intended framing or approved anchor position.
Check the proposed layout from the user’s point of view. Confirm that the bar will not obstruct a door, shower screen, toilet, or transfer path, and that the user’s hand can wrap around it. Recheck for hidden services before making any hole.
Tip: Do not shift a mounting plate slightly to make it look level if that moves a required fastener off the structural support.
Check: The bar sits in a usable position, is aligned as intended, and all mounting holes match the planned support points.
Step 4: Drill the mounting holes
Put on eye protection and follow the bar and drill manufacturers’ instructions. Select a bit made for the surface: tile and masonry need suitable bits, while wood framing needs a bit sized for the specified fastener. Drill slowly through tile to reduce the chance of cracking, and stop if you encounter unexpected resistance or a sign of a pipe or wire. Do not use impact mode on tile unless the bit and instructions specifically allow it.
Make holes to the depth and diameter required by the fasteners. If the bar instructions call for sealing penetrations in a wet area, use the specified sealant around the holes or fasteners. Avoid enlarging holes or forcing a fastener into a misaligned opening.
Tip: A cracked tile, unexpected void, or uncertain obstruction is a reason to stop and reassess, not to keep drilling.
Check: The holes are clean, correctly sized, and positioned at the approved attachment points, with no damaged tile or suspected service line.
Step 5: Fasten the grab bar
Position the bar’s mounting plates over the holes and install the specified fasteners into the structural support or approved rated mounting system. Tighten them evenly with the correct driver. Follow the manufacturer’s torque guidance if provided; excessive force can strip a screw, damage tile, or compromise an anchor. Fit any covers or trim only after the mounting plates are secure.
Do not substitute shorter screws, different anchors, or decorative caps that conceal missing fasteners. If a screw spins without tightening, stop and correct the attachment rather than relying on the remaining screws.
Tip: For a wet area, use only the sealing method and materials allowed by the bar and wall-system instructions.
Check: All required fasteners are installed as directed, and the mounting plates sit firmly against the wall without gaps or visible damage.
Step 6: Inspect and test the installation
Check that the bar is level or at the planned angle and that its grip surface is dry, clean, and free of sharp edges. Push and pull firmly in several directions using controlled force, but do not use a person’s full body weight as the first test. Watch for movement at the bar, plates, screws, tile, and surrounding wall. Follow any load-testing method supplied by the manufacturer.
After the initial check, have the intended user try the movement slowly with a caregiver nearby if needed. Remind them to grip the bar before changing position and not to pull on nearby towel rails or shower fittings. Recheck the fasteners after the first period of use according to the manufacturer’s directions.
Tip: If any part shifts, creaks, cracks, or separates, stop using the bar until the attachment has been inspected and repaired.
Check: The bar remains rigid under the specified check, the wall shows no damage, and the user can reach and grip it during the intended movement.
Common Mistakes to Avoid
- Attaching the bar only to drywall, tile, or a generic plastic anchor. — Fasten into framing, blocking, masonry, or a mounting system specifically rated and approved for grab-bar use. Confirm the attachment method before drilling.
- Choosing placement based on appearance or a standard height instead of the user’s movement. — Mark the position while considering the user’s reach, transfer method, and approach. Seek an occupational therapist’s guidance if the best position is unclear.
- Drilling without checking for plumbing, wiring, or the right bit for tile. — Inspect both sides of the wall, use a suitable detector, select the correct bit, and stop if the wall behaves unexpectedly.
- Using a towel bar, suction-cup bar, or decorative fixture for body-weight support. — Use a grab bar specifically rated for support and install it with its approved hardware and method.
Troubleshooting
Problem: The stud finder gives inconsistent readings.
Solution: Calibrate it as instructed and scan slowly in both directions. Confirm likely stud positions with a magnet at drywall screw locations or another non-destructive method. Do not drill until you have verified the attachment point; call an installer if the wall remains uncertain.
Problem: A marked mounting hole does not line up with a stud.
Solution: Do not move the fastener into unsupported drywall or use a generic anchor. Choose a bar length or position that reaches appropriate framing, add approved blocking through a suitable access method, or use a rated mounting system installed to its instructions.
Problem: Tile cracks or the drill bit wanders.
Solution: Stop drilling. Check that the bit is suitable for tile, use slow speed and light pressure, and use masking tape or a guide if the bit maker recommends it. Have damaged tile and the underlying attachment area assessed before continuing.
Problem: The bar moves or a screw will not tighten.
Solution: Stop using the bar and remove it for inspection. Check for a stripped screw, wrong fastener, damaged substrate, or missed framing. Repair the wall and reinstall with an approved method; do not compensate by adding random screws.
What Success Looks Like
The finished bar is positioned where the user can reach it during the intended movement, and every required mounting point is attached to framing, masonry, blocking, or a rated system approved for the wall. The bar and plates show no movement, the wall and tile are intact, and the installation passes the manufacturer’s check. The user can grip it without stretching, twisting, or treating another fixture as support.
Next Steps
Keep the manufacturer’s instructions and note the installation date and attachment method. Inspect the bar and surrounding wall regularly, and check again after any impact, renovation, leak, or change in the user’s mobility. Tighten or repair only as the manufacturer directs; if the bar loosens or the wall changes, stop using it until repaired. Review other fall risks as well, including slippery flooring, poor lighting, loose rugs, and obstructed paths. Ask a clinician or occupational therapist about additional supports when the user’s needs change.
Frequently Asked Questions
Can I install a grab bar into drywall with wall anchors?
Only use an anchor system specifically rated for grab bars, suitable for the wall and installed exactly as instructed. Generic drywall anchors are not an appropriate substitute for structural attachment. When in doubt, use framing or blocking installed by a qualified person.
Where should a bathroom grab bar go?
Place it where the user can grasp support during the specific movement, such as stepping into a tub or rising from a toilet. The best position and orientation vary by reach, strength, transfer technique, and room layout. A therapist can recommend placement for an individual user.
Are suction-cup grab bars safe for fall prevention?
Do not rely on a suction-cup bar for body-weight support unless its manufacturer explicitly rates it for that use and the installation conditions match its instructions. Many suction products are intended only as balance aids and can release without warning. A securely mounted bar is the safer choice for substantial support.
How much weight should a grab bar support?
Use the load rating stated by the bar and mounting-system manufacturers, and follow their installation and testing instructions. The rating depends on the complete assembly, including the wall and fasteners, not just the metal bar. A label on the bar alone does not confirm that an incorrect installation is safe.
When should I hire a professional?
Hire a qualified installer if you cannot identify the wall structure, need blocking behind finished tile, suspect hidden pipes or wiring, or lack tools and experience for the surface. Seek an occupational therapist or other qualified clinician when you need help choosing locations suited to a person’s mobility and transfer needs.